Image Classification with Pre-trained Computer Vision Models in PyTorch
Blog Post
Computer Vision | Pytorch
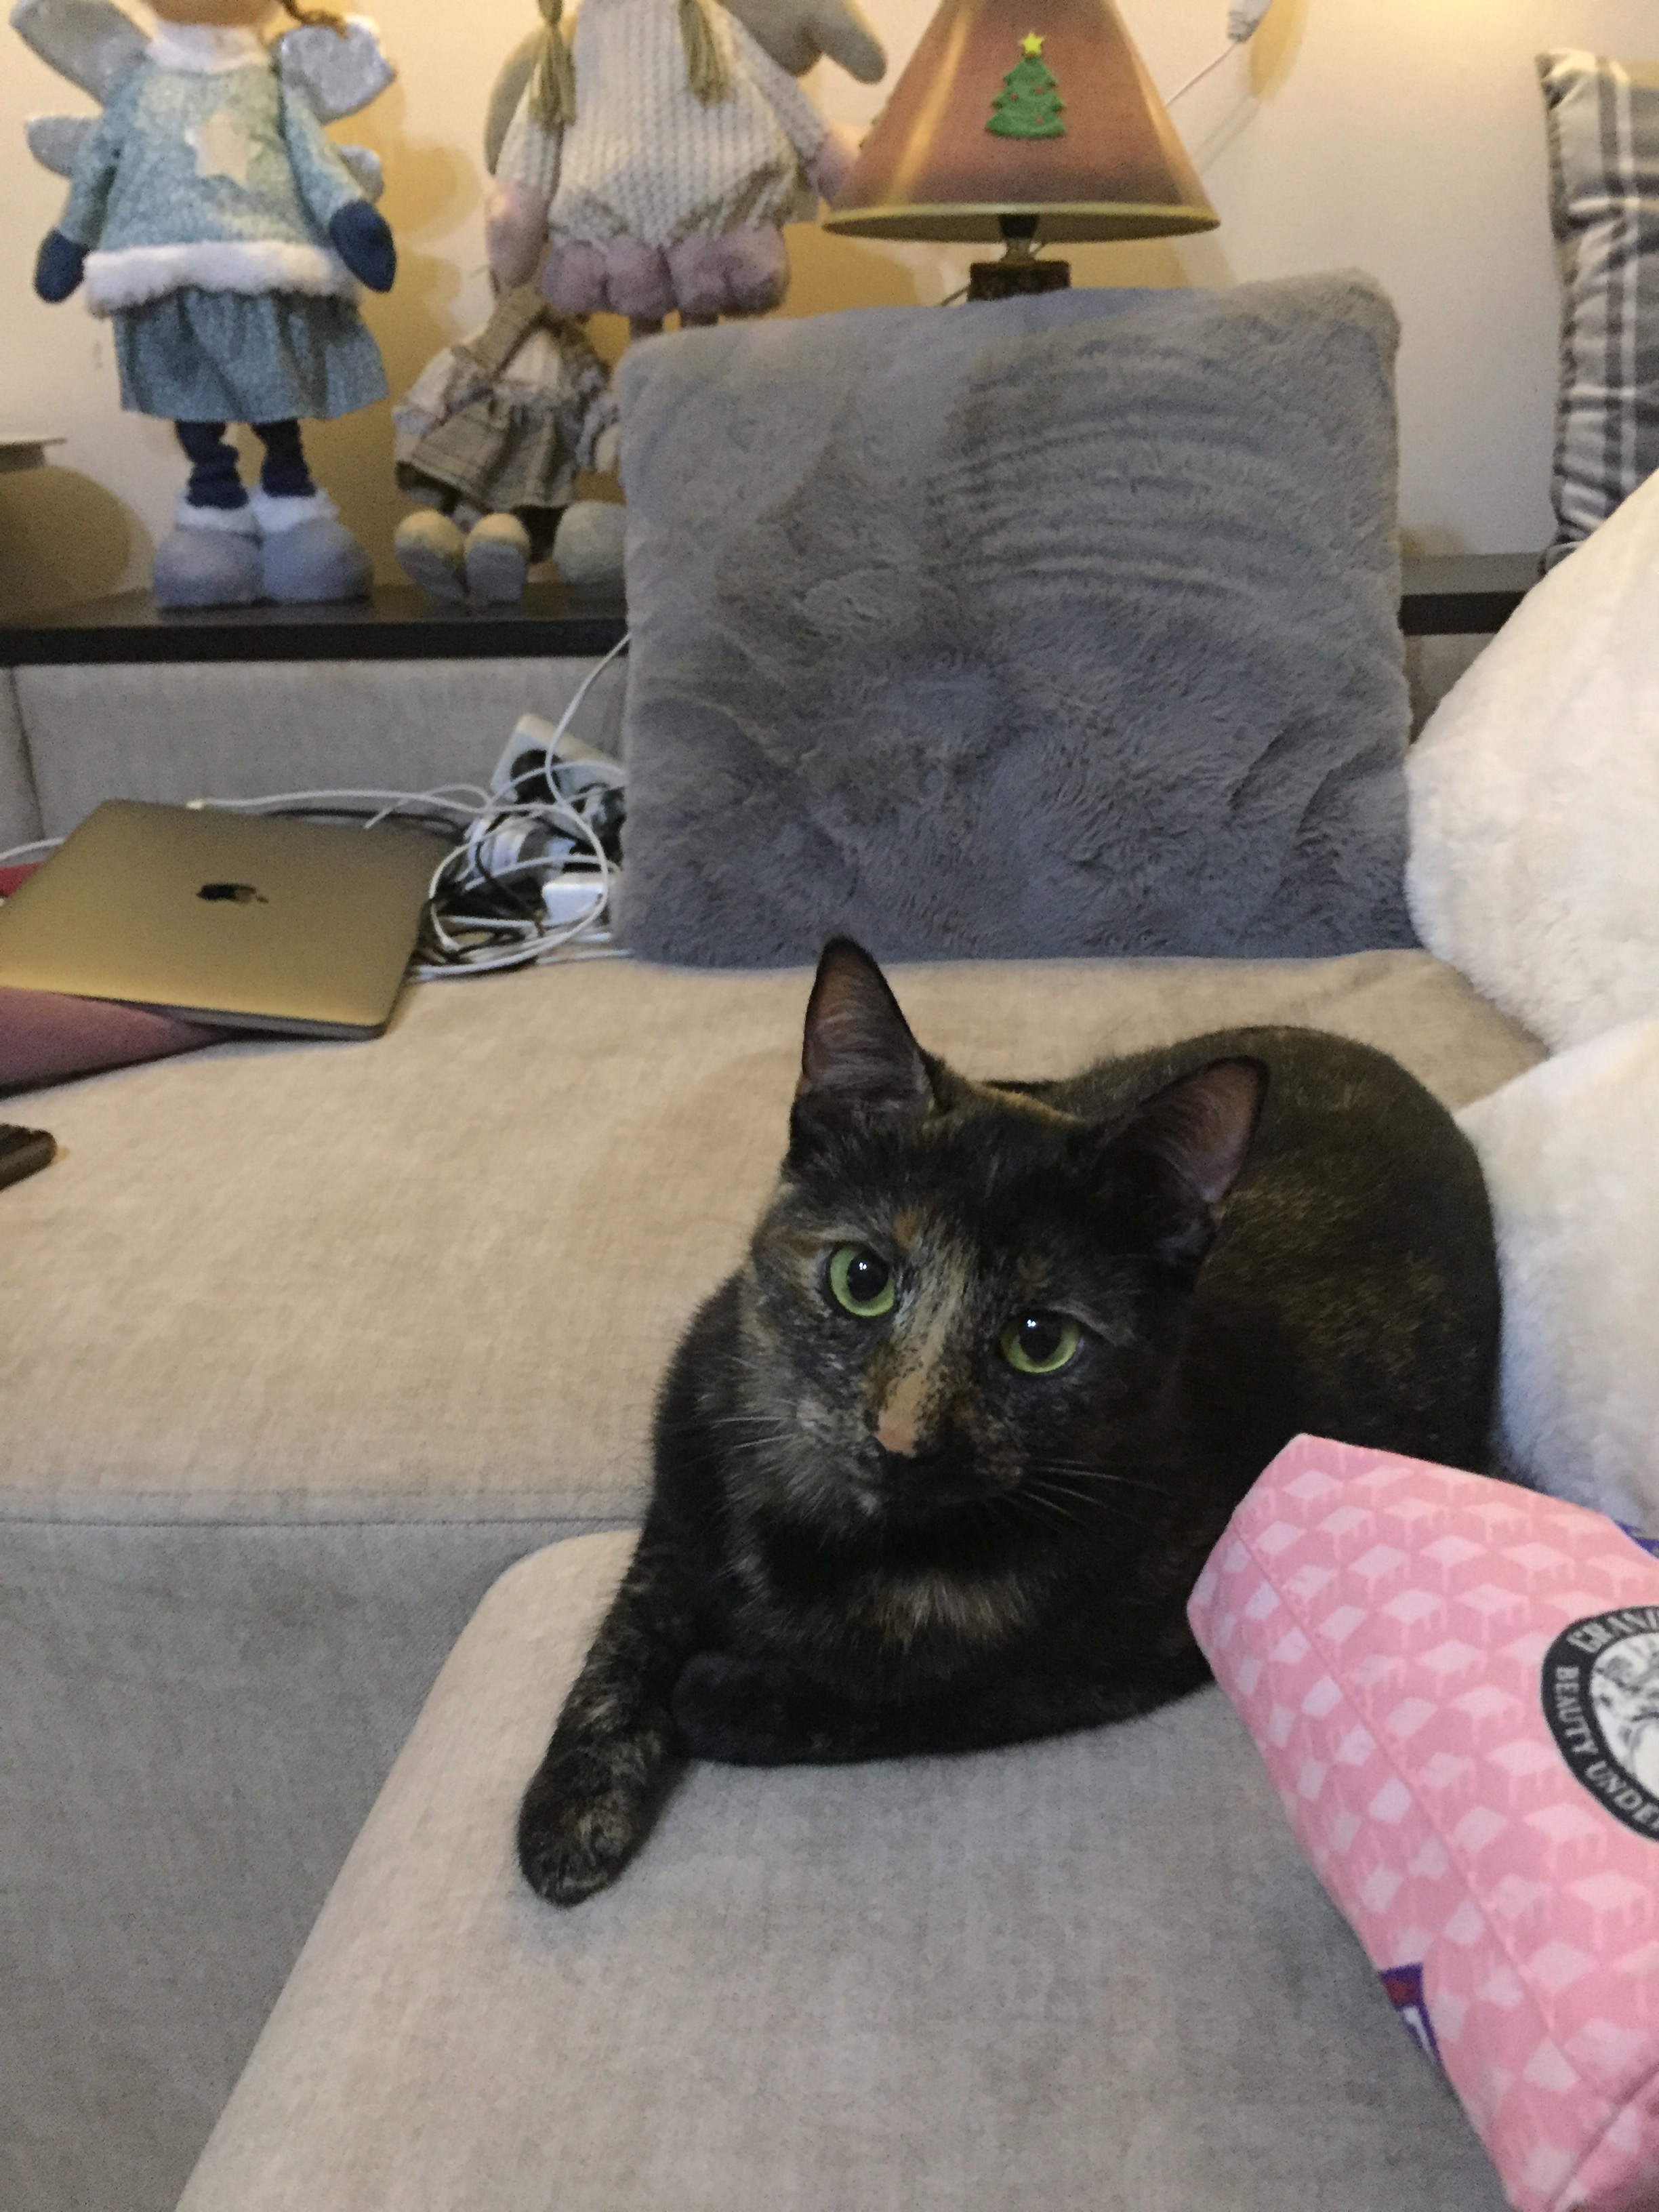
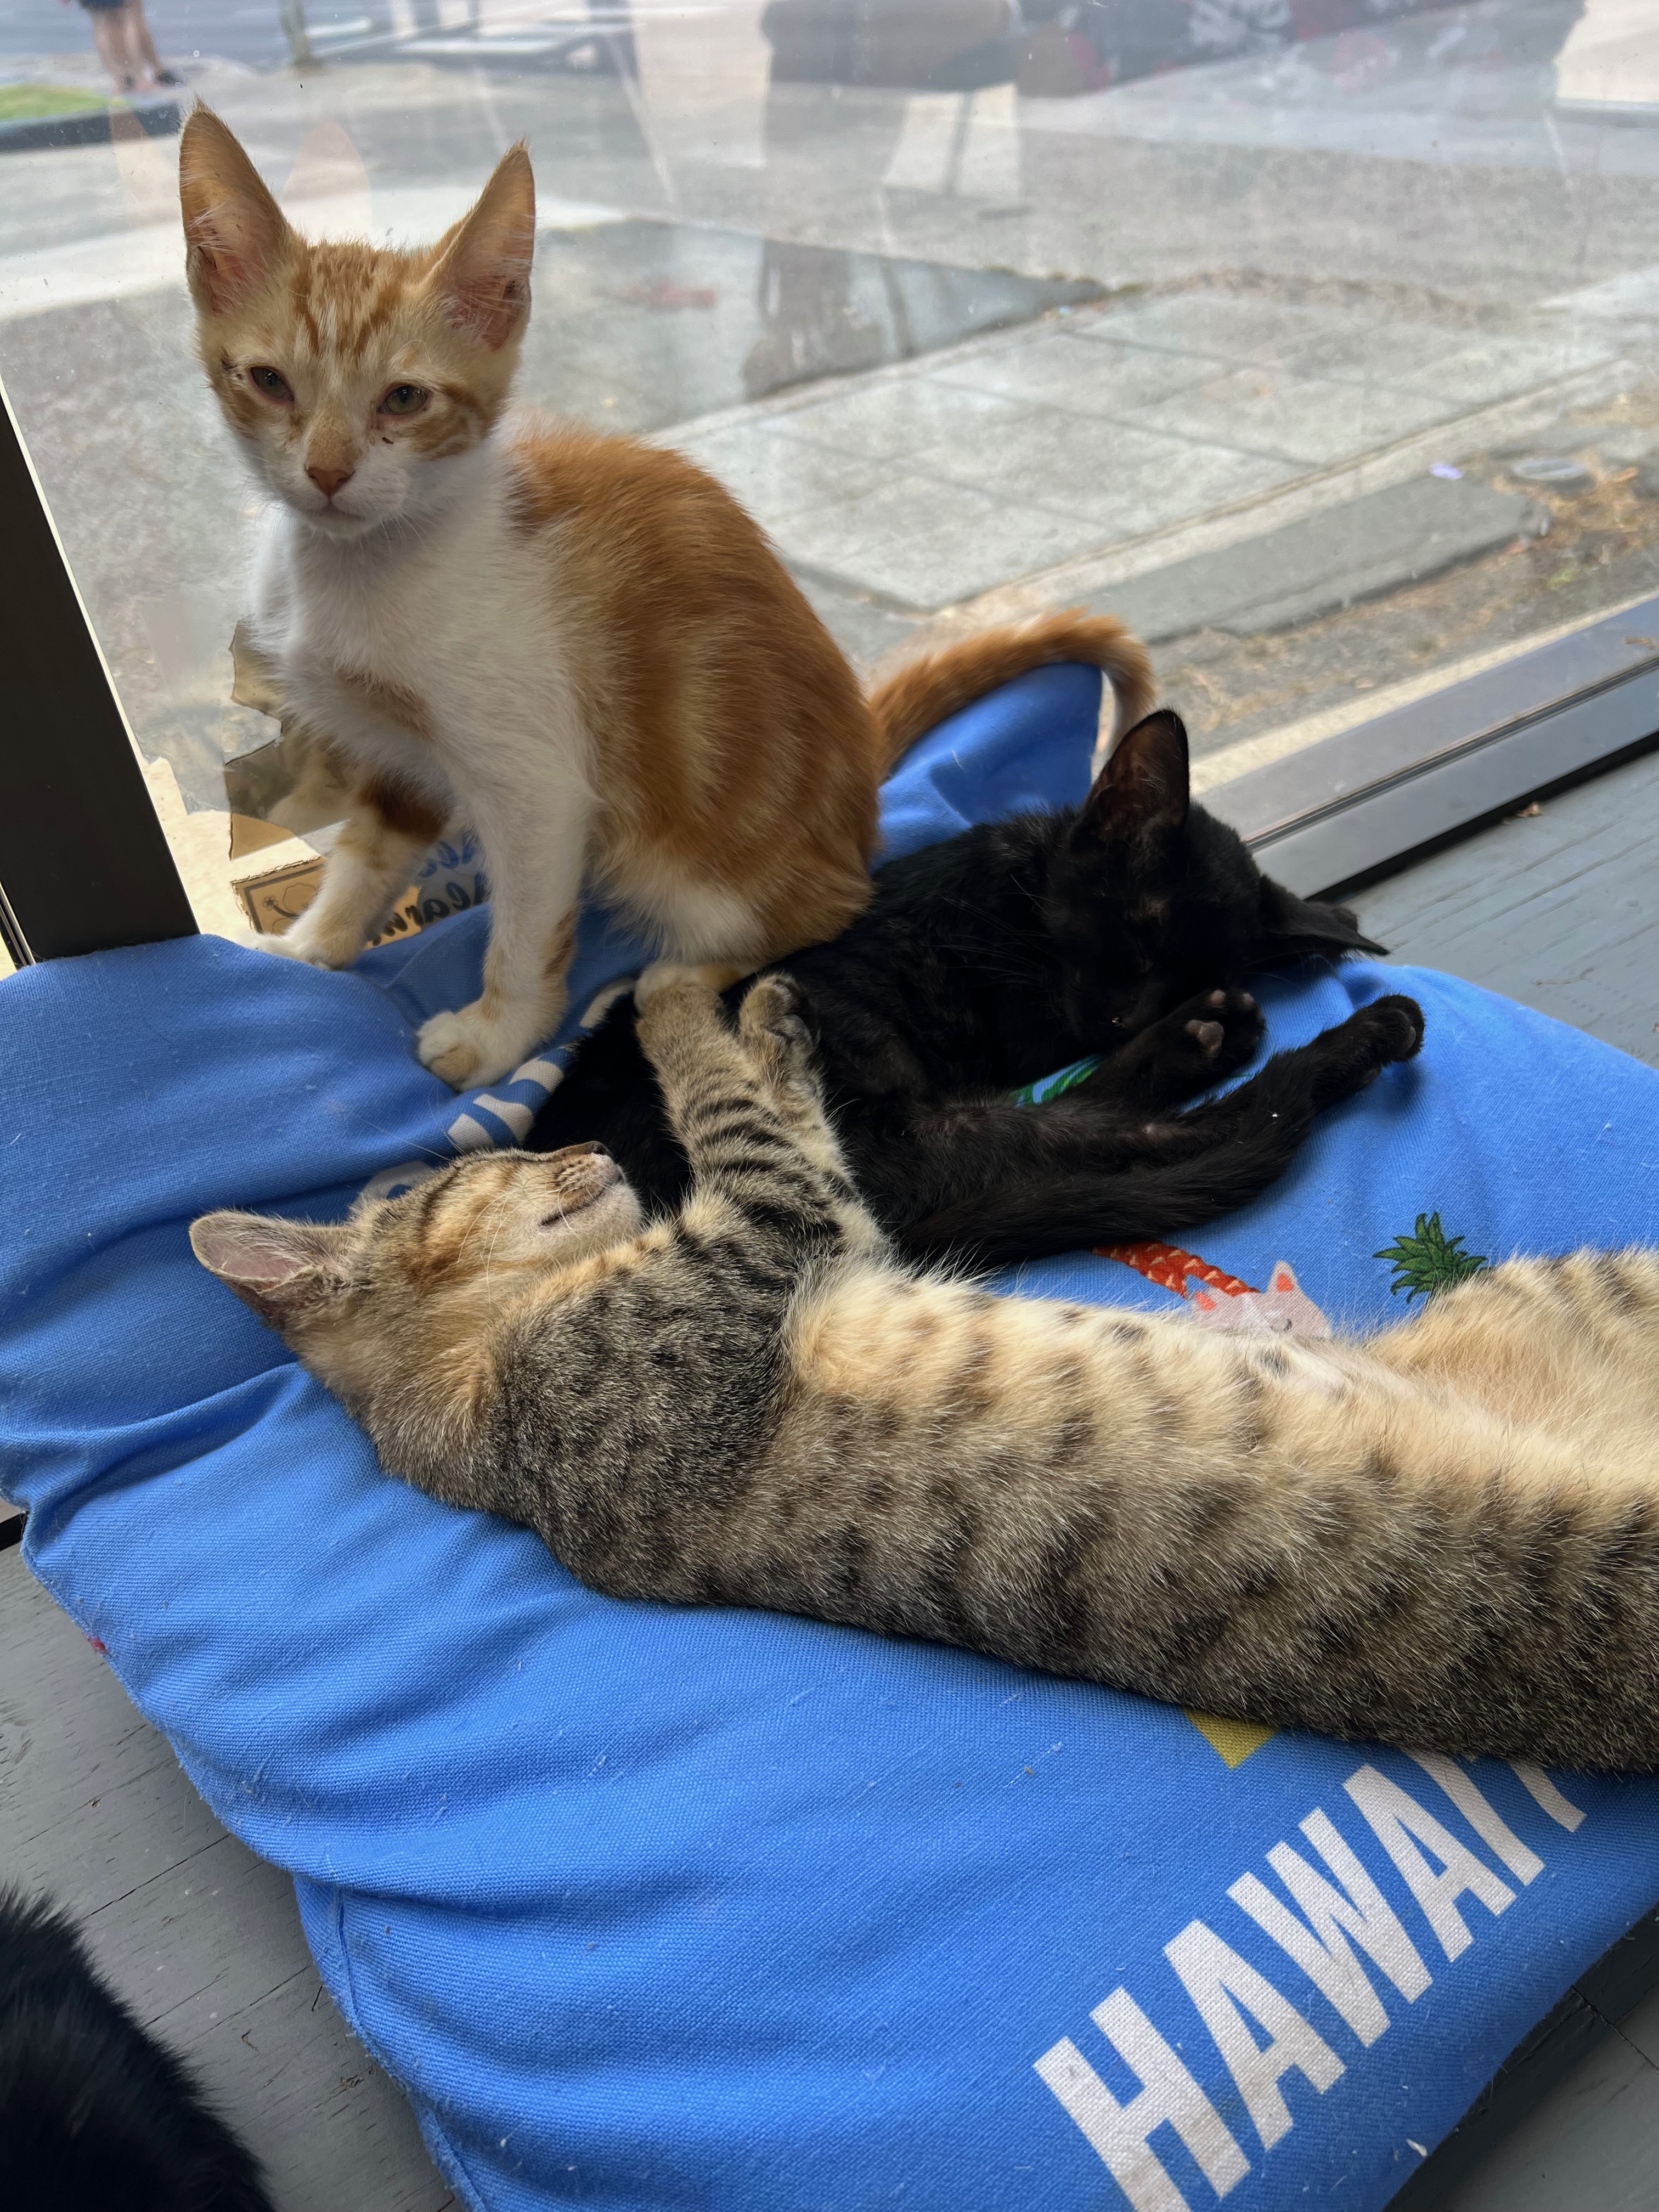
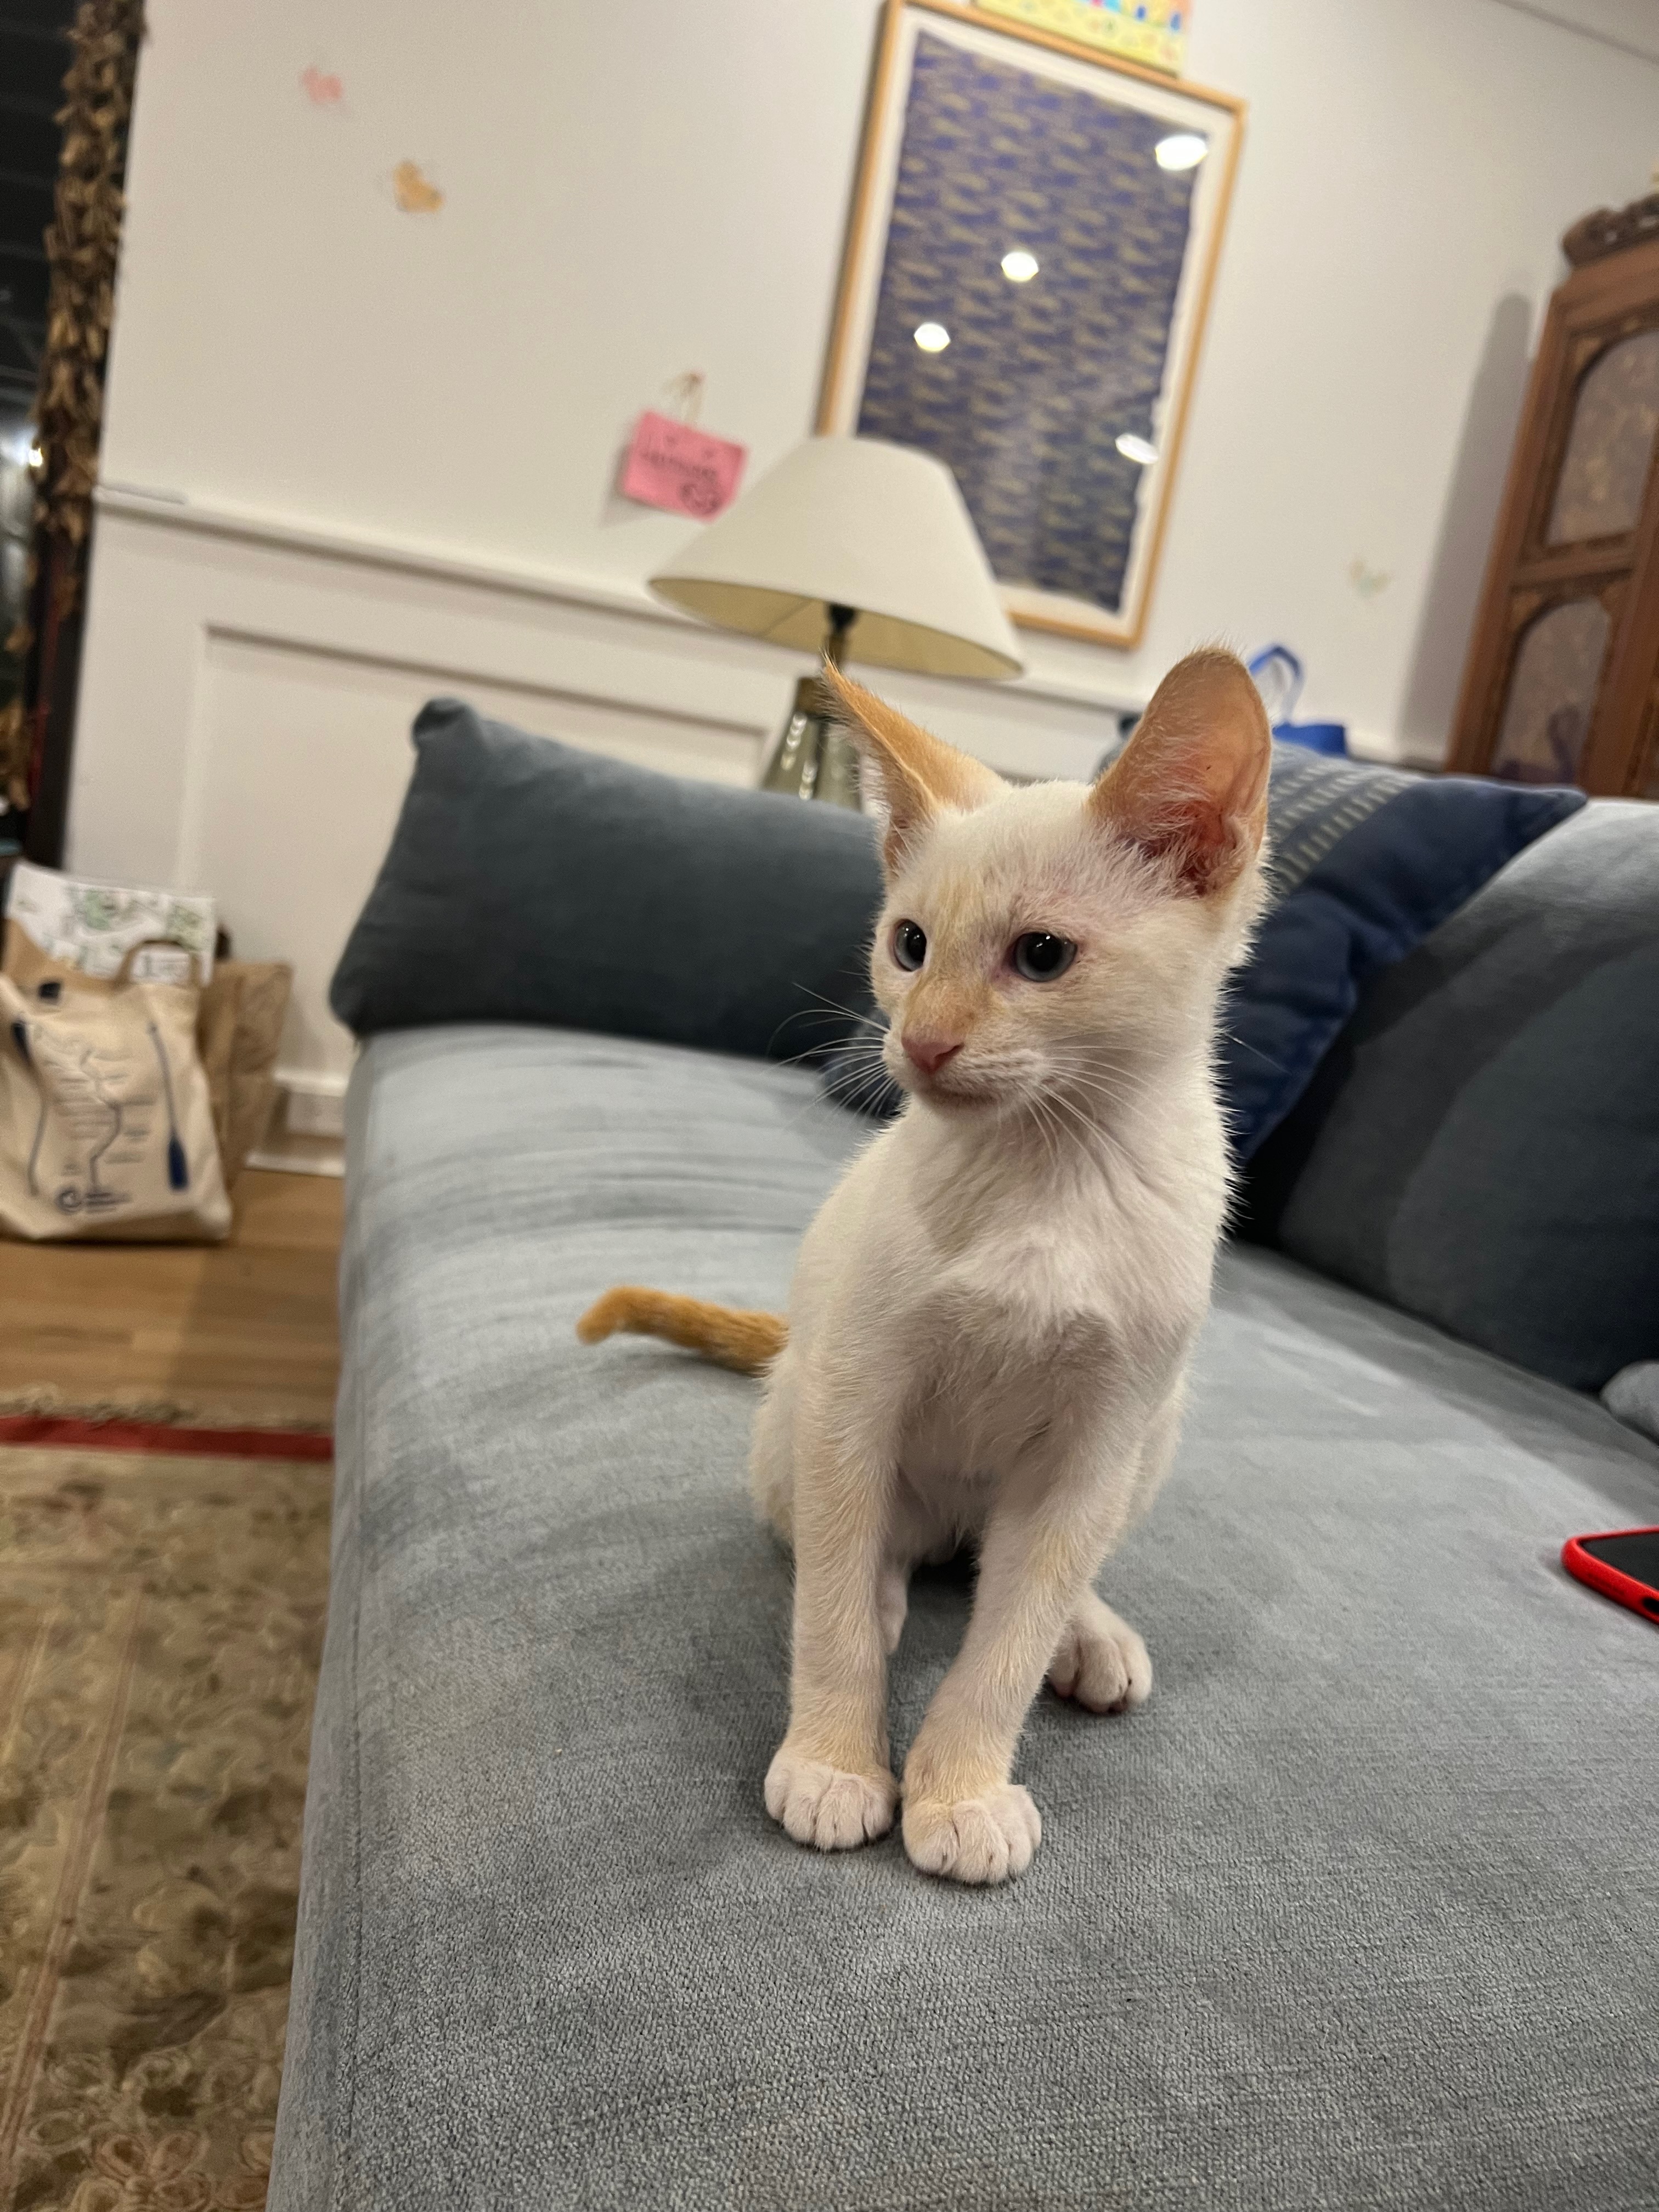
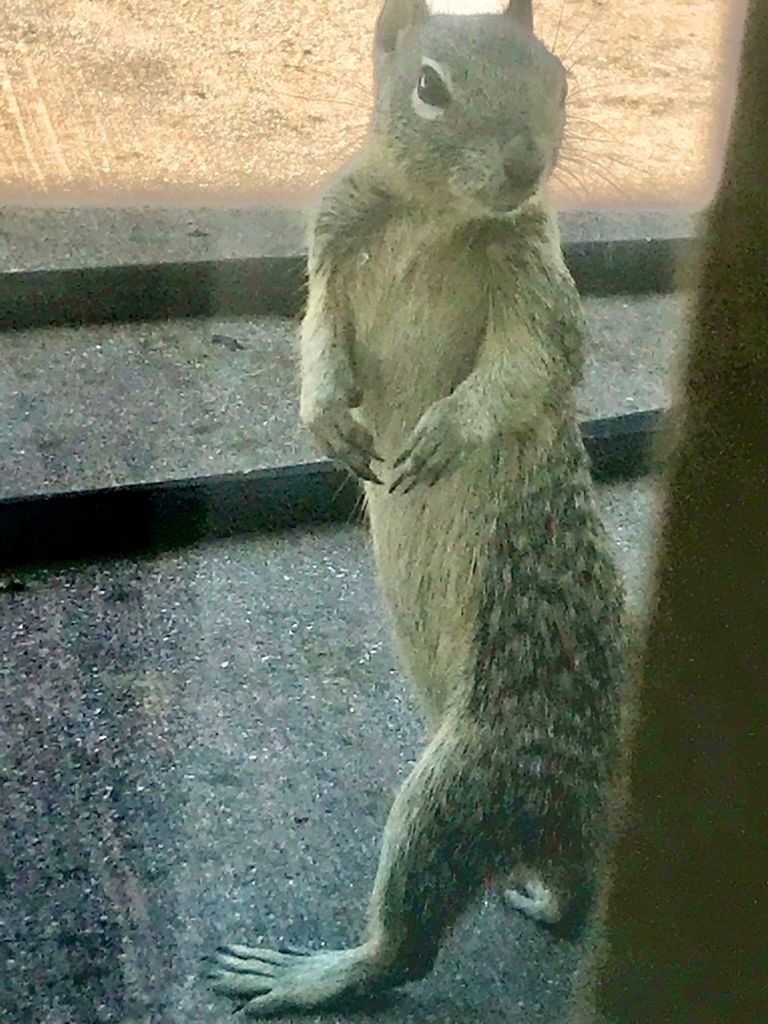
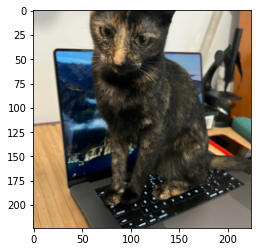
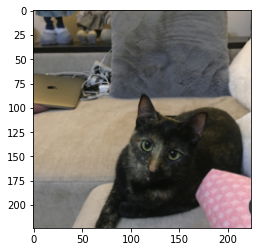
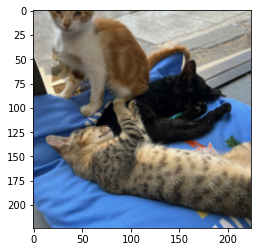
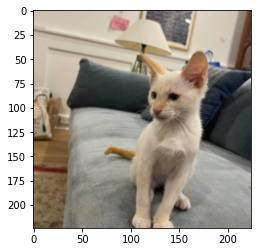
How good are state of the art Computer Vision models at identifying my cat Ada in a picture? This is, more or less, the question that prompted the exploration presented here. In this article, we will look at a practical example of using pretrained computer vision models available in PyTorch for inference, to do image classification. In particular, we will use the ResNet model to classify images containing a number of images of pets. Note that we will not be performing any type of training (such as finetuning the pretrained models on our training task), but rather output one of the classes available from the model itself. We will go through each step of the process, from image pre-processing, retrieving predictions from the pretrained model, and analyzing the output. Of course, you can use the same methodology and predict on your own images. The images we want to classify are:


Alright, let's get started and see how we can use ResNet to classify these lovely pets, and also, examine how good the predictions are!
Image Classification
But first, let's briefly cover the task of Image Classification. Image Classification answers the following question:Given a image -> what does that image represent?ResNet, the model we will be using in this article is trained on the ImageNetdataset, which contains 1000 classes, among which a number of cat and dog breeds. Metrics of more models on this dataset can be found here. Note that while there are models performing higher than ResNet on the ImageNet dataset, the performance of the ResNet architecture is high enough that it should still give good results. The Pytorch implementation of ResNet with 152 layers (which we will be using) has a top-1% error of 21.69 and top-5% error of 5.94.
Imports
First, we need to import a number of packages. We need the torch and torchvision packages to get the pretrained models, numpy to transform the images, and matplotlib to display the images.
  %matplotlib inline
  import torch
  import torchvision
  import torchvision.transforms as transforms
  import matplotlib.pyplot as plt
  import numpy as np
Initialize pretrained model
Now, we initialize the pretrained computer vision model we will be using: ResNet. Using Pytorch, we can do so in only one line of code, as shown below. ResNet is a state of the art deep learning model trained on ImageNet. For more details about the model itself, you can visit its webpage or read the corresponding paper.Things to note here:
- While we are using ResNet, Pytorch offers a comprehensive list of other computer vision models you can load and experiment with. The entire list of models can be found here, under 'Vision'. The method in which you can load them is the same. Some examples you can experiment with include VGGNet , Inception or AlexNet
- ResNet has 5 different versions, which contain 18, 34, 50, 101, 152 layers. Note that here, we load the biggest one, which contains 152 layers
- We need to make sure to set the model.eval() so that the model is in evaluation, and not training, mode
  model = torch.hub.load('pytorch/vision:v0.10.0', 'resnet152', pretrained=True);
  model.eval()
Upload a photo
Great, now that we have initialized the model, we can load a photo. We will be using the PIL library to do this, and numpy to load the pixels.
  from PIL import Image
  import numpy as np
  # creating a image object
  im = Image.open("/content/ada.jpeg")
  pixels = np.asarray(im)
display(im)
This is the un-processed version of the image. We can look at the initial dimension of the image.
pixels.shapeTransform Image
Note that, according to the PyTorch page for ResNet, the model expects images in the format (3 x H x W), where H and W are expected to be at least 224. The images have to be loaded in to a range of [0, 1] and then normalized using mean = [0.485, 0.456, 0.406] and std = [0.229, 0.224, 0.225]. Consequently, we need to transform the image to follow this format and also load the data into a tensor format. We follow the methodology suggested by PyTorch:
  def resnet_transform_images(mu, std):
      return transforms.Compose([
      transforms.Resize(256),
      transforms.CenterCrop(224),
      transforms.ToTensor(),
      transforms.Normalize(mean=mu, std=std),
  ])
  def imshow(images, mu, std_var):
    npimg = torchvision.utils.make_grid(images).numpy()
    npimg_transp = np.transpose(npimg, (1, 2, 0))
    npimg_transp = npimg_transp * std_var + mu     # unnormalize
    plt.imshow((npimg_transp * 255).astype(np.uint8))
  mu = [0.485, 0.456, 0.406]
  std = [0.229, 0.224, 0.225]
  img = resnet_transform_images(mu, std)(im)
  img_tensor = img.unsqueeze(0)
img_tensor.shapeWe can now see that the dimension of the processed image is (1, 3, 224, 224), which will fit into the ResNet model. That also means that the image has been cropped, and, as we can see, re-centered:
imshow(img_tensor, mu, std)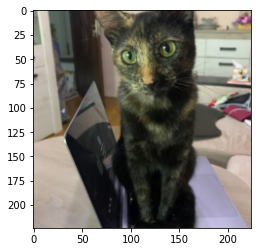
Get Predictions
Now that we have an image that can fit into the ResNet model, let's use the model to do inference and get the predicted classes.First, let's download the classes used by ImageNet. We will need these in order to know how to map from the classes the model outputs for an image (as numbers), to the descriptive labels they correspond to. Note that this command will download a file imagenet_classes.txt in the current folder.
!wget https://raw.githubusercontent.com/pytorch/hub/master/imagenet_classes.txt
  with open("imagenet_classes.txt", "r") as f:
categories = np.array([s.strip() for s in f.readlines()]) len(categories)We can see that we have a total of 1000 classes. Now let's print some sample classes - here are 10 samples:
np.random.choice(categories, 10, replace = False)Now let's see what our model predicts on our initial image!
  def predict(images, model):
    with torch.no_grad():
      outputs = model(images)
      probs =  torch.nn.functional.softmax(outputs, dim=1)
      probs_labels, pred_labels = torch.topk(probs, 5)

      probs_labels = probs_labels.squeeze().numpy()
      pred_labels = pred_labels.squeeze().numpy()
    return pred_labels, probs_labels
  print('Predictions')
  print('=' * 30)
  preds, probs = predict(img_tensor, model)
  for pred, prob in zip(preds, probs):
    print('Category: %s, Probability: %2f' % (categories[pred], prob))
Predictions
==============================
Category: tabby, Probability: 0.470609
Category: Egyptian cat, Probability: 0.406148
Category: tiger cat, Probability: 0.081435
Category: photocopier, Probability: 0.006049
Category: printer, Probability: 0.004371
==============================
Category: tabby, Probability: 0.470609
Category: Egyptian cat, Probability: 0.406148
Category: tiger cat, Probability: 0.081435
Category: photocopier, Probability: 0.006049
Category: printer, Probability: 0.004371
It looks like for this image, the top choices are different cat breeds, so the model is working pretty well! While my cat Ada is not a tabby or an Egyptian cat, and only metaphorically a tiger cat, the fact that the top 3 predicted classes are cat-related is encouraging. Let's try predicting a few more pictures!
Predictions
=================
Category: laptop,
Probability: 0.504977
Category: notebook,
Probability: 0.246912
Category: computer keyboard,
Probability: 0.129945
Category: space bar,
Probability: 0.049168
Category: mouse,
Probability: 0.020669
Predictions
=================
Category: Egyptian cat,
Probability: 0.220818
Category: tabby,
Probability: 0.093764
Category: tiger cat,
Probability: 0.043862
Category: purse,
Probability: 0.037481
Category: sleeping bag,
Probability: 0.034918
Predictions
=================
Category: Egyptian cat,
Probability: 0.935708
Category: tiger cat,
Probability: 0.031417
Category: tabby,
Probability: 0.030745
Category: lynx,
Probability: 0.001550
Category: remote control,
Probability: 0.000174

Predictions
=================
Category: tabby,
Probability: 0.467902
Category: Egyptian cat,
Probability: 0.423090
Category: tiger cat,
Probability: 0.049405
Category: quilt,
Probability: 0.017489
Category: remote control,
Probability: 0.006777
Predictions
=================
Category: Egyptian cat,
Probability: 0.930395
Category: Siamese cat,
Probability: 0.026431
Category: tabby,
Probability: 0.007882
Category: quilt,
Probability: 0.007549
Category: tiger cat,
Probability: 0.004132
Predictions
=================
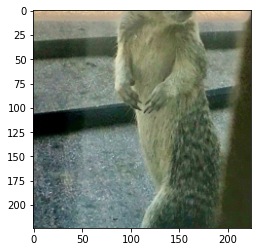
Category: meerkat,
Probability: 0.547480
Category: mongoose,
Probability: 0.138101
Category: baboon,
Probability: 0.104021
Category: fox squirrel,
Probability: 0.103073
Category: macaque,
Probability: 0.022226
Analysis
Correct predictions: Okay, so we can see that the predictions are largely in the correct ballpark. For the first four pictures, the model outputs different types of cat breeds, with 'Egyptian cat' and 'Tabby' as the most commonly predicted ones. While cat connoisseurs might disagree that these are indeed 'Egyptian' or 'Tabby' cats, it is possible that these are the closest classes available from the model. If we wanted to understand what are all the cat breeds that the model could have outputted, we'd have to search through the categories for cat breeds, to see what the model might have missed. Incorrect predictions: Meanwhile, there are other observations we can make. For instance, for the first picture in the sequence of six above, we can see that the model did not recognize at all that there is a cat in the picture! The model picked up on the laptop in the picture as the top prediction, but completely missed the cat - even in its subsequent class predictions! It is possible that this happened because during the pre-processing of the picture, the cat's ears got cut out from the image. One hypothesis could be that this was a key signal that the model was using to identify a cat present in the image. However, to be more certain in our hypothesis, we would have to make further analyses. Class probabilities Another interesting thing is looking at the probabilities for the top predicted class. In some cases, such as the third and fifth picture, the probabilities for 'Egyptian cat' are quite high, above 0.9, showing that the model has a high confidence in its predictions. In other instances, such as the second and the forth picture, and even the picture we first predicted on, we see that the probabilities are quite low, smaller than 0.5, so the model is not very certain in its predictions. It is possible that lighting, position of the cat and its features in the picture, or picture cropping also affect these probabilities. Image pre-processing Last but not least, the last picture of a squirrel actually got a top prediction of a 'meerkat'! This makes sense when we see that during picture pre-processing, the head of the squirrel got cropped out, which might have been a key feature for identification. Summary
To summarize, in this article, we looked at how to use pretrained Computer Vision models in inference mode, to classify images. We covered:- Brief overview of the Image Classification task
- How to initialize a pretrained model in Pytorch
- How to pre-process an image for prediction
- How to get a prediction using pretrained models
- Analysis of predictions
Takeaways
There are also a number of takeaways we can take:- We can load pretrained models from Pytorch and use them for inference with only a few lines of code
- We don't have to train models from scratch if the task a model was trained on matches our own task
- Computer Vision models take the output in a particular format, and we need to preprocess our images to match that
- Even for high-performing models, it's not guaranteed that predictions in practice will be always correct. Image cropping, lighting, occlusions, as well as other features in the picture might affect quality of predictions.
Next Steps
There are a number of next steps you can take, such as:- Use the methodology in this tutorial to get predictions on your own pictures and desired classes!
- Experiment with other computer vision models. The entire list of models available from Pytorch can be found here. The method in which you can load them is the same. Some examples you can experiment with include VGGNet , Inception or AlexNet. You can also check out the Papers With Code website for the top performing models on the Image Classification task.
- Experiment with other Computer Vision tasks. For a list, check out the Papers With Code website.
References
- All available pretrained models in Pytorch
- ResNet, PyTorch
- VGGNet, PyTorch
- Inception_V3, PyTorch
- AlexNet, PyTorch
- ImageNet Dataset
- MNIST Dataset
- CIFAR-10/100 Datasets
- Papers With Code Computer Vision SoTA models and benchmarks
- ResNet Paper: Deep Residual Learning for Image Recognition, Kaiming He, Xiangyu Zhang, Shaoqing Ren, Jian Sun
- VGGNet Paper: Very Deep Convolutional Networks for Large-Scale Image Recognition, Karen Simonyan, Andrew Zisserman
- Inception_V3 Paper: Rethinking the Inception Architecture for Computer Vision, Christian Szegedy, Vincent Vanhoucke, Sergey Ioffe, Jonathon Shlens, Zbigniew Wojna
- AlexNet Paper: One weird trick for parallelizing convolutional neural networks, Alex Krizhevsky